
How to Make a Drawstring Bag for Kits
PLEASE DO NOT MAKE THESE BAGS UNLESS THEY ARE FOR LOCAL PROJECT USE OR ARE SPECIFICALLY REQUESTED OF YOU BY A HARVESTCALL CHURCH PROJECT TEAM
These instructions are for Health Kits. If making a School Kit drawstring bag, follow the same instructions, but make the final bag 10” x 16” instead of 8” x 10”
NOTE: These instructions are provided as a help. If you have another way to make a draw-string bag, or a different pattern, feel free to use yours as long as the end product is a drawstring bag of similar size.
Supplies needed:
- Cloth
- Pencil or fabric marking pencil
- Pins
- Ribbon or string
- Safety pin or elastic threader
Steps
See photos below
- Cut cloth. Any of the following pieces will result in a bag that is approximately 8” x10”, which is the typical health kit size. (See Kit Instructions) The following options are given depending on the size of piece of material that you have.
- 1 piece of cloth 18” by 12” (fold is on the side)
- 1 piece of cloth 24” by 9” (fold is on the bottom)
- 2 pieces of cloth 12” by 9”
- Put right sides together . Fold the cloth in half keeping the right sides together if you chose option a or b. If you chose option c, put the two pieces of cloth together with the right sides together.
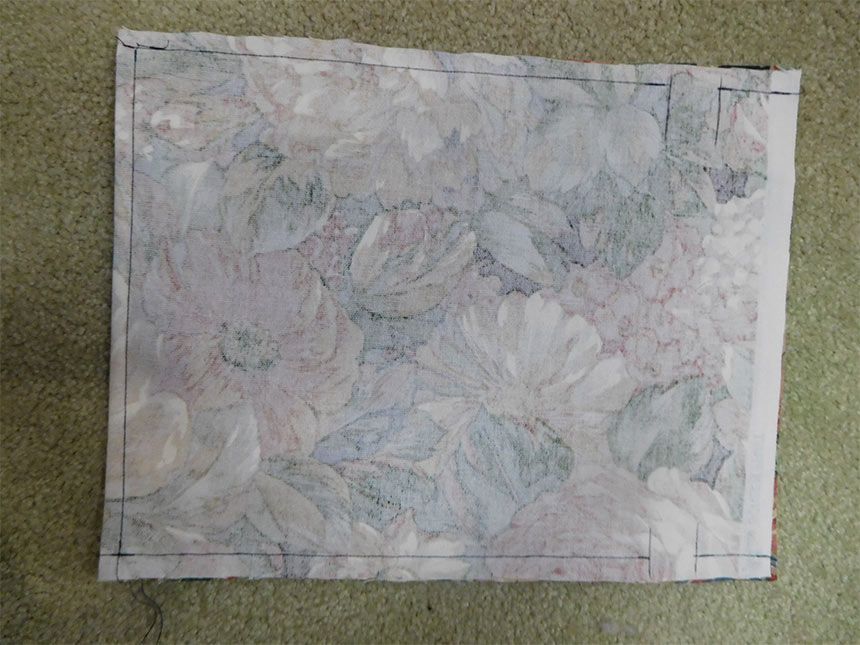
- Mark lines for string . Mark a short line on the cloth 1 ½” down from the top of the bag AND 2 ½” down from the top of the bag (one inch down from the other line). The line should be horizontal with the top of the bag.
- Pin together . Pin the right sides together. Important note: If the cloth was folded on the side edge (option a above), then cut 3” down the side fold.
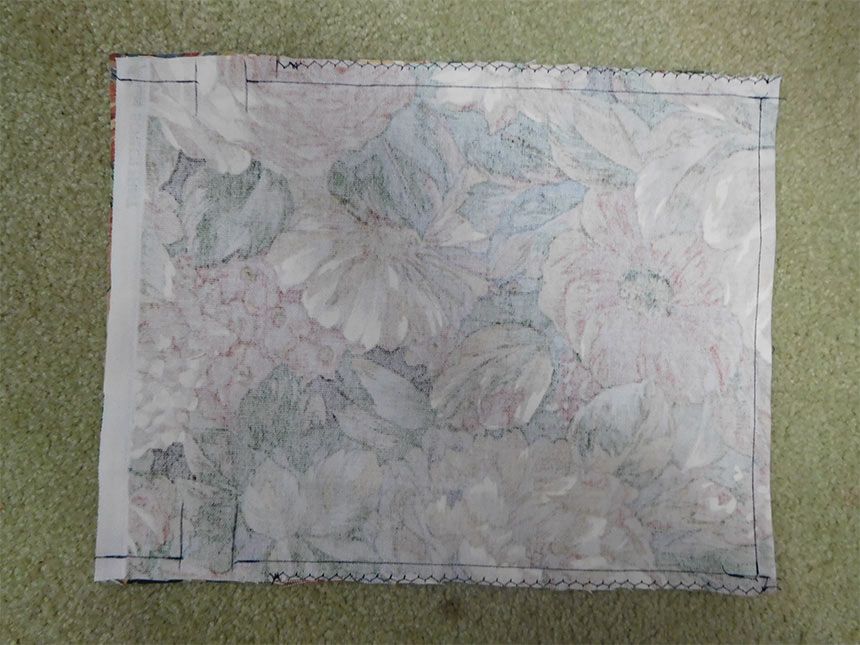
- Sew sides and bottom but NOT between the two marks. The space between the two marks leaves room for the string. Use ¼” seam allowance. Start on one side of the bag. Sew down to the line. Stop. Skip down to the second line. Sew down the side to the bottom. Pivot and sew across the bottom. Pivot and sew back up the other side. Stop at the lower line. Skip to the next line. Sew to the top. Backstitch at any start and stop.
- Zigzag where you sewed but NOT above the marks. (Not between the two marks or above the top mark.)
- Turn bag right side out. Use a pencil or your finger to get them completely turned.
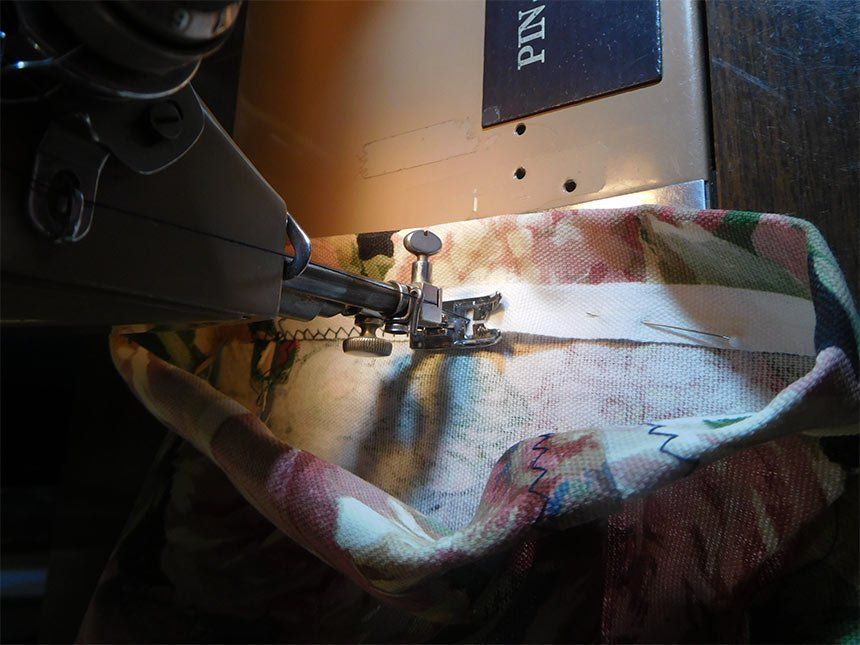
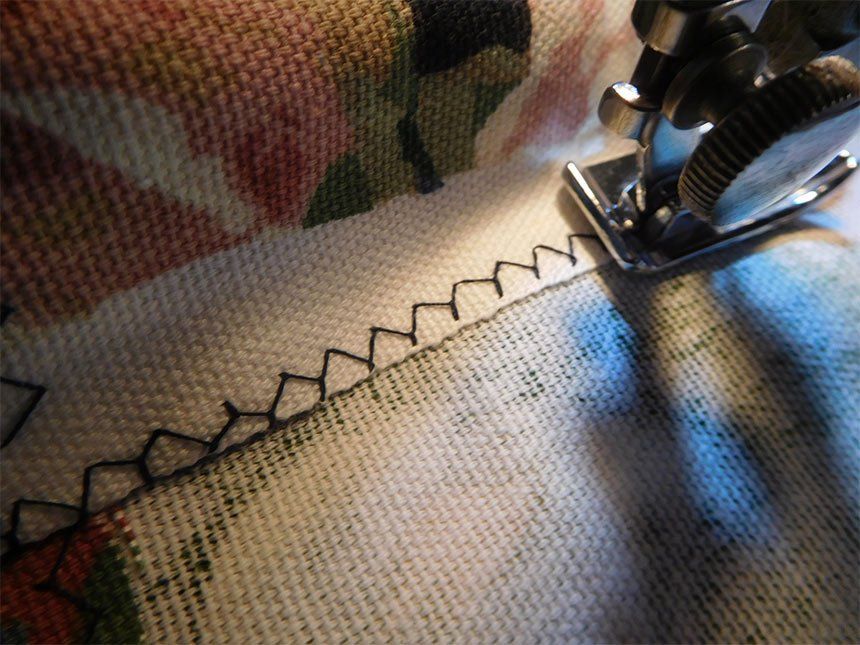
- Zigzag raw edges of seam allowance by string opening . Open the seam by both holes and zigzag the seam allowance so it lays flat.
- Fold down each side of the top edge to form the string casing. Fold to the 1½ in mark, with wrong sides together, and pin.
- Sew casing . Zigzag along the folded edge to form a casing.
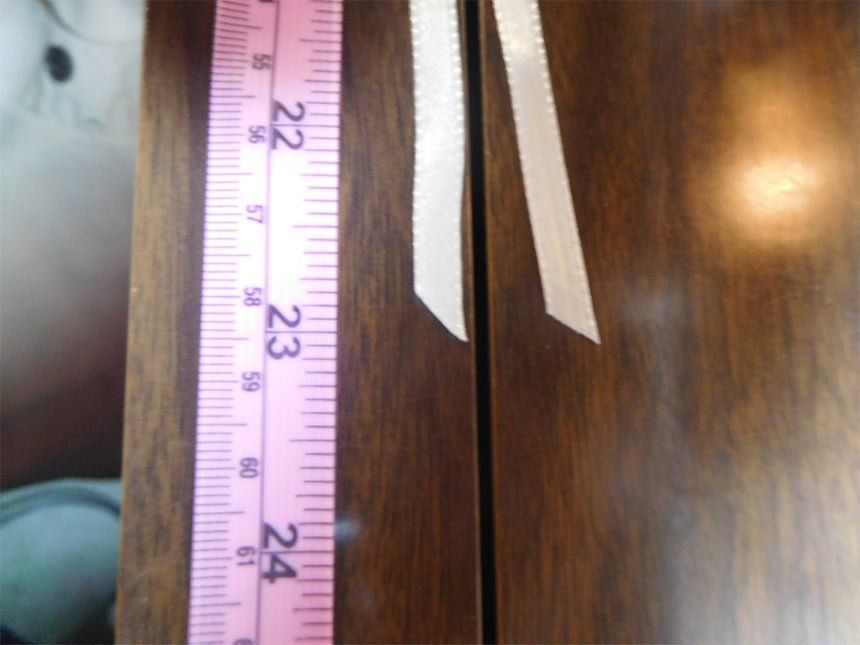
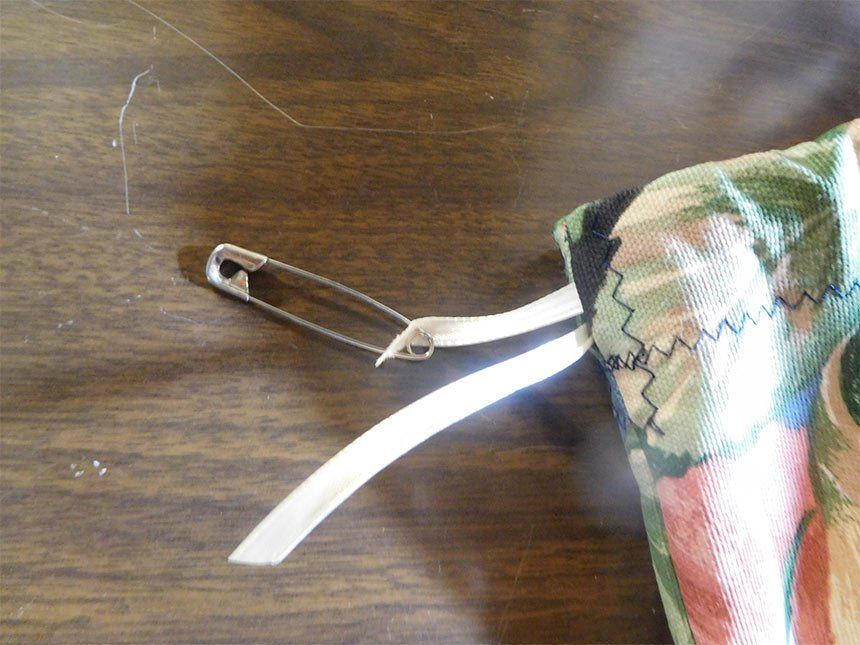
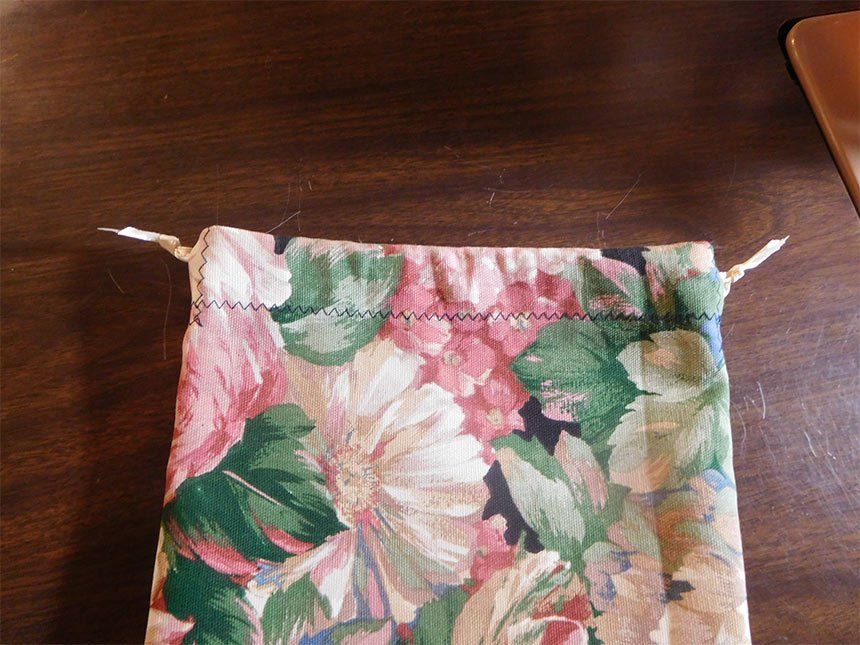
- Insert string. Ribbon may be used. Cut two 23 in ribbons. Hook a safety pin on the end to help work the ribbon through the casing (or use an elastic threader). After both are all the way around the bag, tie the ends.


Assembly


LOCAL DISTRIBUTION IDEAS
- Contact kit coordinator to direct to a HarvestCall Center where they will be filled with sewing supplies and shipped.
- Current kit coordinator: Carol Indermuhle. indermuhle@ohio.net 330.658.4731.
- Or fill your own, according to items listed for school kits or health kits and deliver locally.
SHIPPING TO HARVESTCALL DISTRIBUTION CENTERS
Please follow these instructions to ensure all items are properly labeled to eliminate confusion and wasted time at Distribution Centers.
PDF
If you prefer having the instructions as a printable document, download it here.